> ## Documentation Index
> Fetch the complete documentation index at: https://docs.1capture.com/llms.txt
> Use this file to discover all available pages before exploring further.
# Start Capture
## Install 1Capture
Open the macOS App Store, search for 1Capture (or click the link below), then open the app page and click Install.
Mac App Store
## Taking Screenshots
When you need to take screenshots, you can quickly get started by using the following two methods.
Press the default shortcut `Option` `Option` to enter capture mode. This shortcut can be changed in the settings panel.
If you forget the shortcut, you can also click the 1Capture icon in the menu bar to open the 1Capture menu and start capturing from there.
## Select Capture Area
After entering capture mode, you can start selecting the capture area. 1Capture offers three capture modes:
1. Area Capture: Right-click and drag to select the capture area.
2. Window Capture: Click a window to capture that specific window.
3. Full-Screen Capture: Press F to select the current screen for annotation; press Enter to save and copy the current screen immediately.
Unlike system screenshots, 1Capture allows you to adjust the capture area. You can freely resize the area for area and full-screen captures, while window captures can only be adjusted within the window boundaries. Drag the capture area border to adjust it.
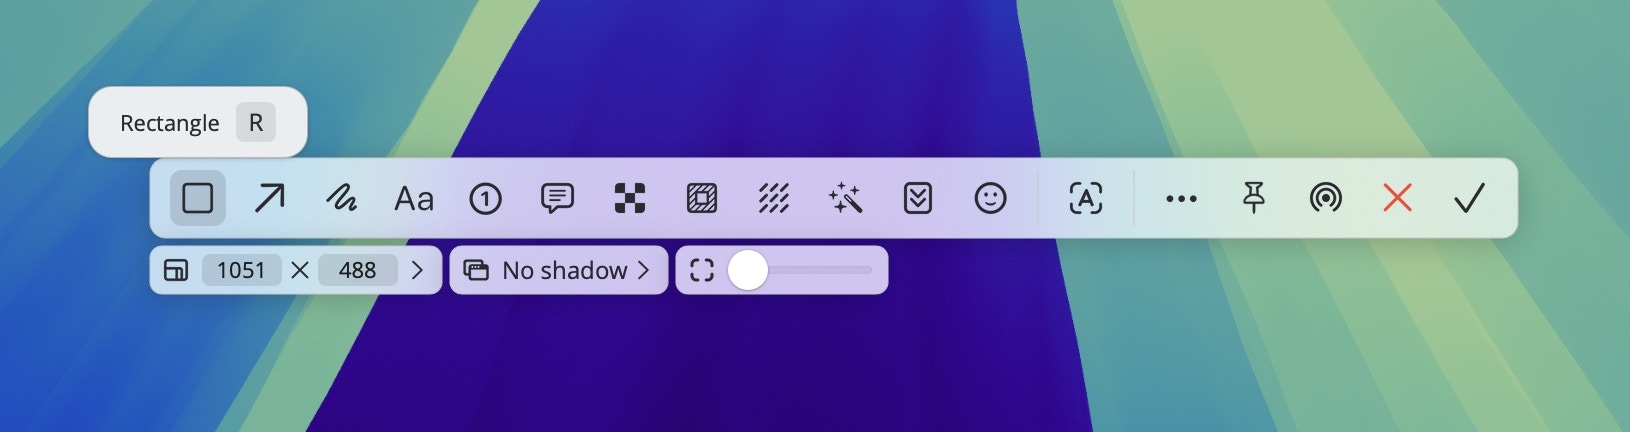
## Annotate Screenshots
After capture an area, an annotation toolbar appears beside the area. Hovering the cursor over a tool icon displays its name and local shortcut. Selecting a tool opens a secondary toolbar for configuring that tool. Once configured, you can annotate within the capture area.
 ## Save Screenshots
After completing all annotation operations, you can save the screenshot. 1Capture offers save, copye, AirDrop, pinning images, and other saving options. Click the corresponding icon to proceed.
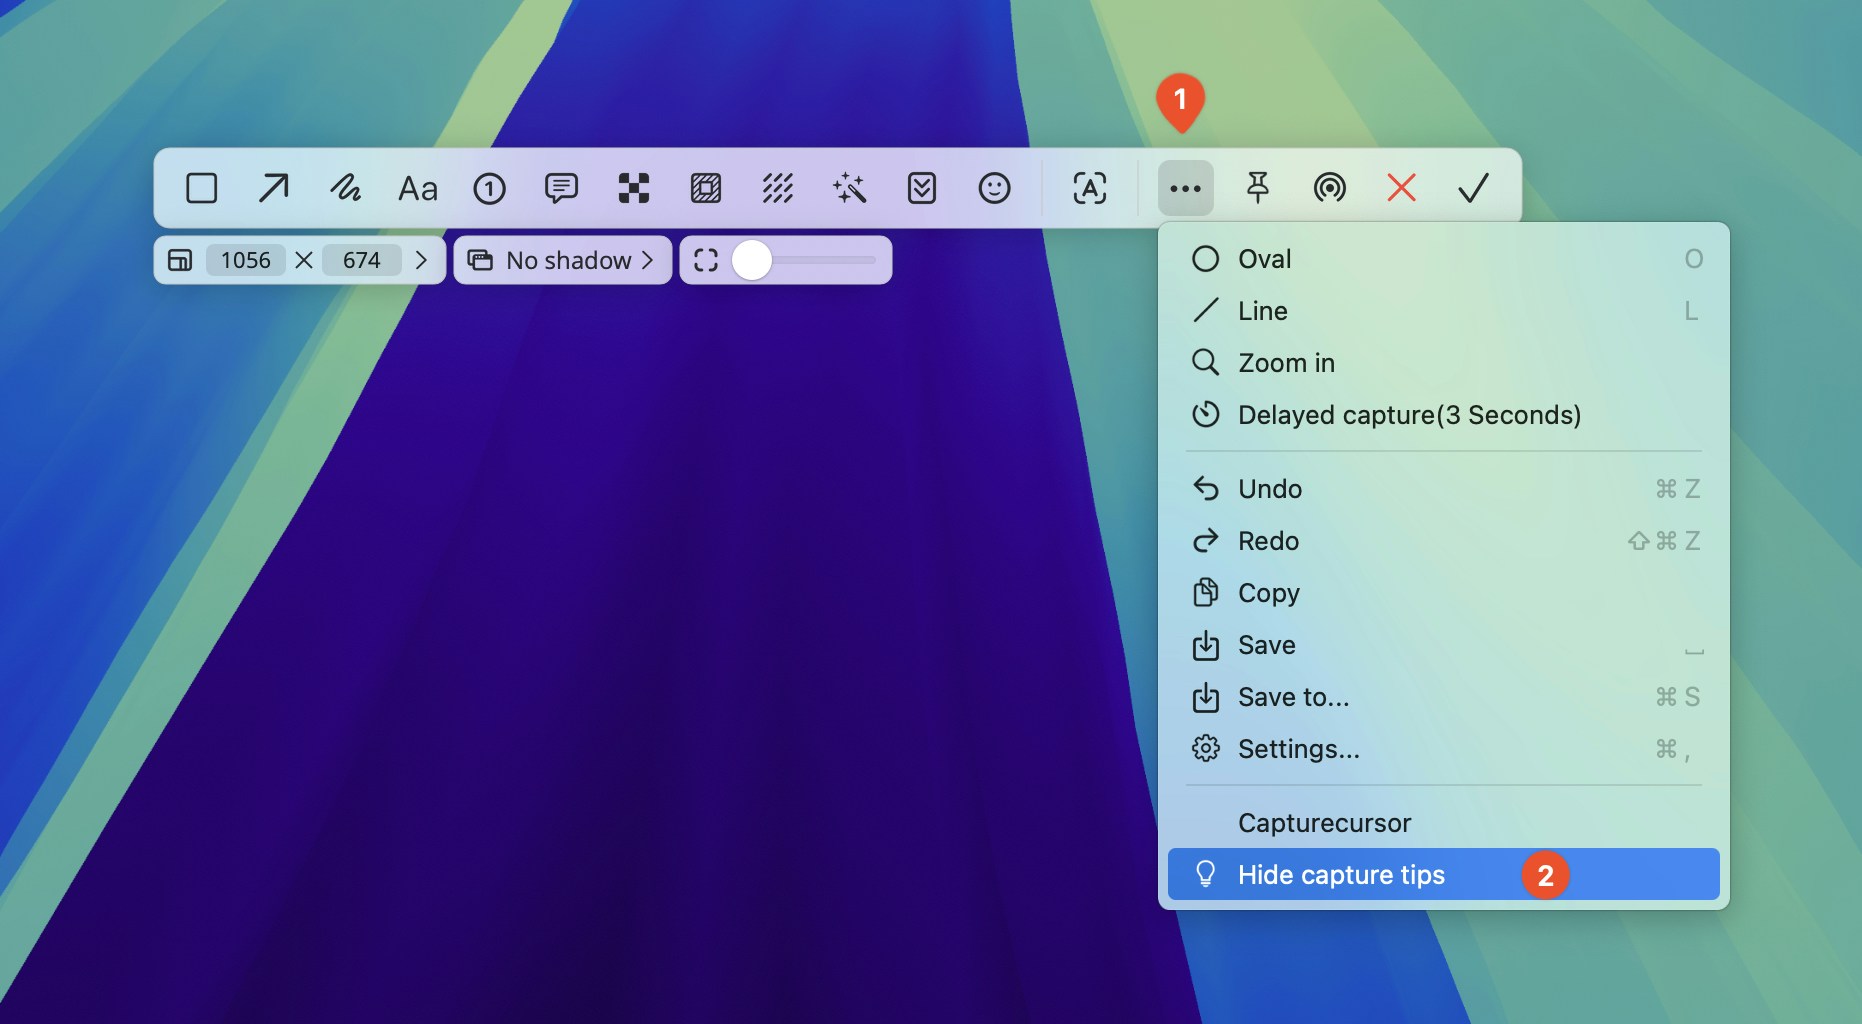
## Capture Tips
Each time you enter capture mode, a prompt appears in the lower-left corner of the screen. If you're unfamiliar, refer to the prompt for guidance. Once familiar, you can disable it from the toolbar menu.
## Save Screenshots
After completing all annotation operations, you can save the screenshot. 1Capture offers save, copye, AirDrop, pinning images, and other saving options. Click the corresponding icon to proceed.
## Capture Tips
Each time you enter capture mode, a prompt appears in the lower-left corner of the screen. If you're unfamiliar, refer to the prompt for guidance. Once familiar, you can disable it from the toolbar menu.